
Schedules
Run an App Service automatically on a schedule and email the results.
A schedule runs an App Service for you, daily, weekly, monthly, quarterly, or yearly, and emails the results to the people you choose.
You can schedule your own apps and any app shared with your organisation. Your schedules are yours: other people don’t see or manage them.
Create a schedule
Section titled “Create a schedule”-
Open the app from App Services and go to its Schedules tab, then click New schedule. Or, after a run, click Schedule it above the results.
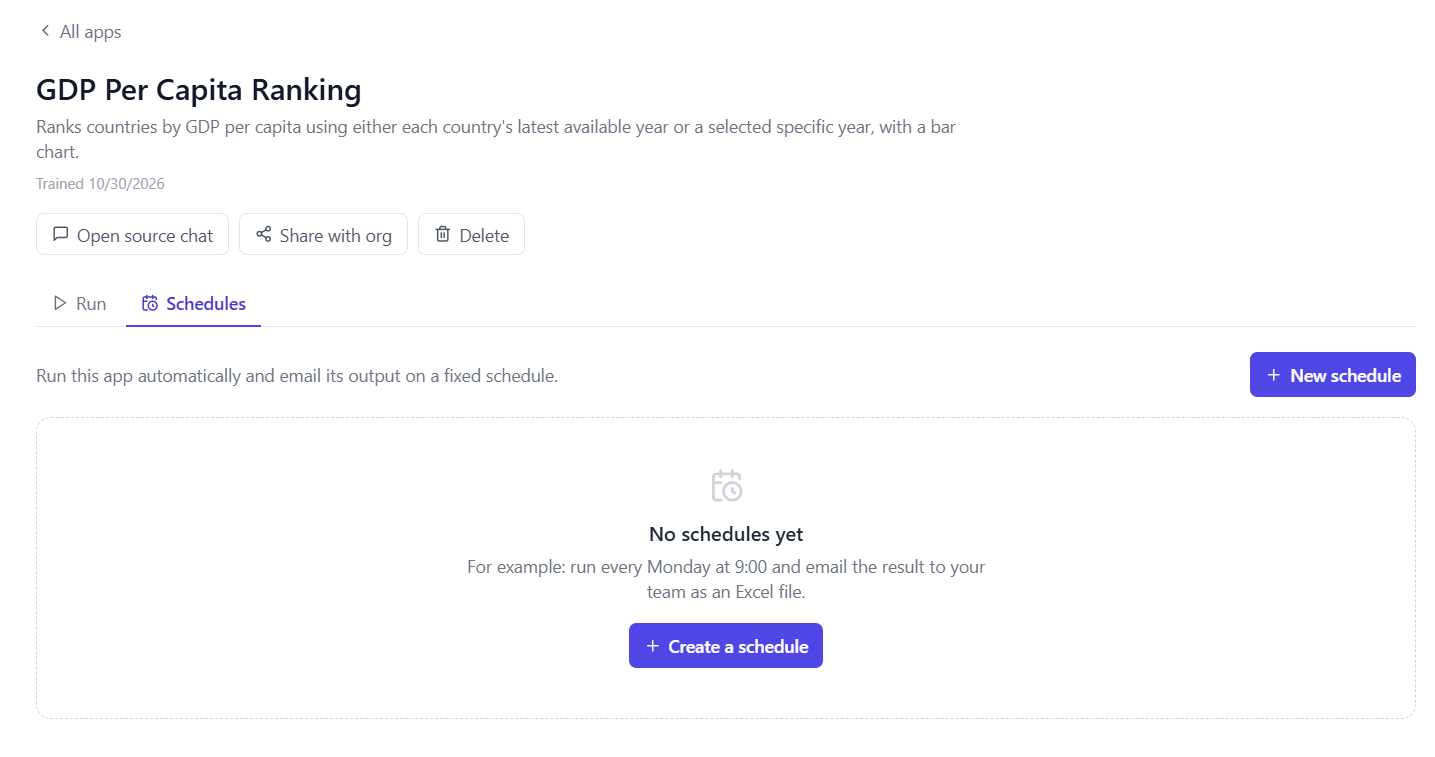
-
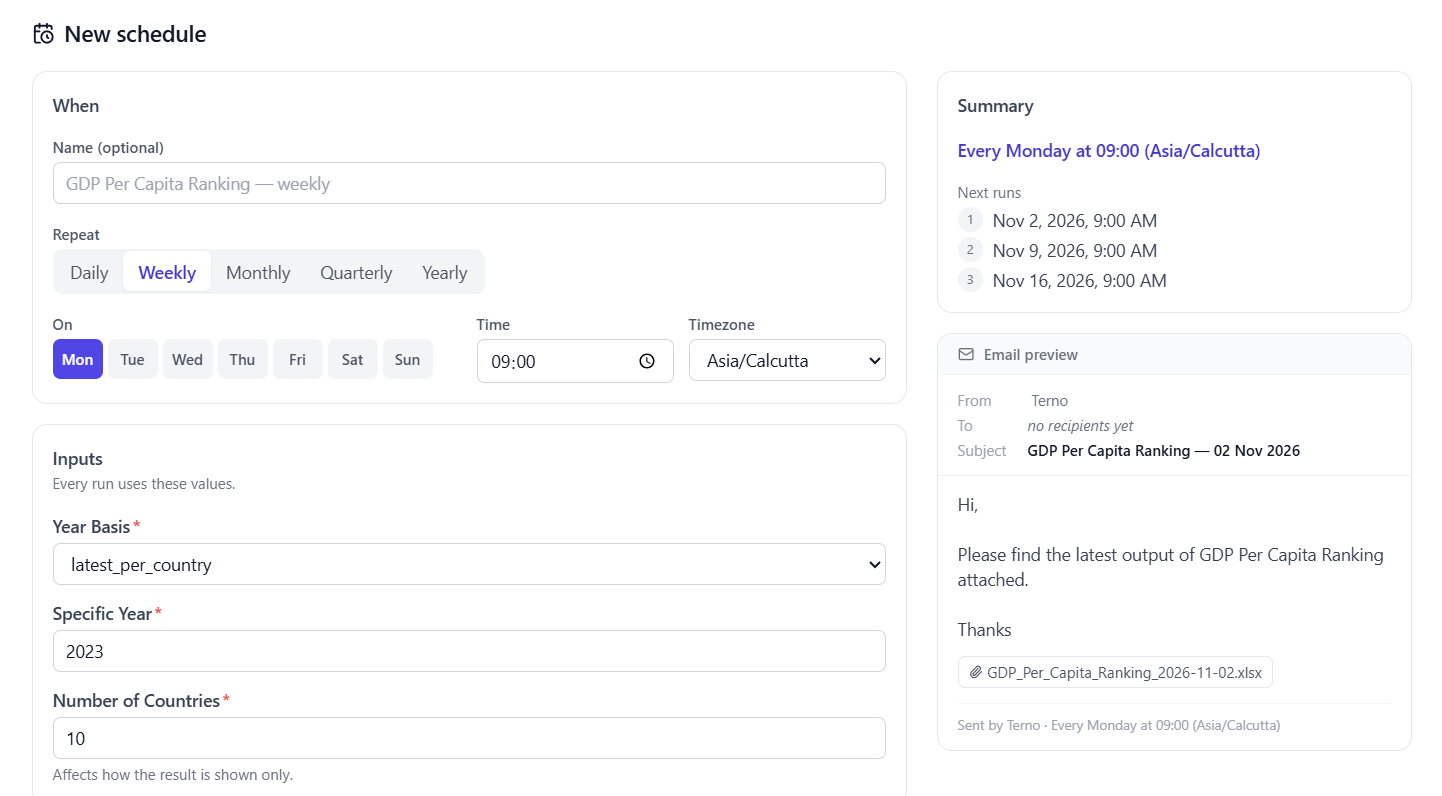
When: give the schedule a name (optional), then choose how often it repeats, the day, the time, and your timezone.
- Weekly: pick the day of the week.
- Monthly: pick the day of the month. If the month is shorter, it runs on the last day.
- Quarterly: pick the month of the quarter and the day.
- Yearly: pick the month and the day.
-
Inputs: set the values the app should use on every run. They’re fixed when you save the schedule. Edit the schedule to change them.
-
Email: add the recipients (up to 20), a subject, and an optional message. Under Attach output as, choose any of Excel, CSV, or Charts.
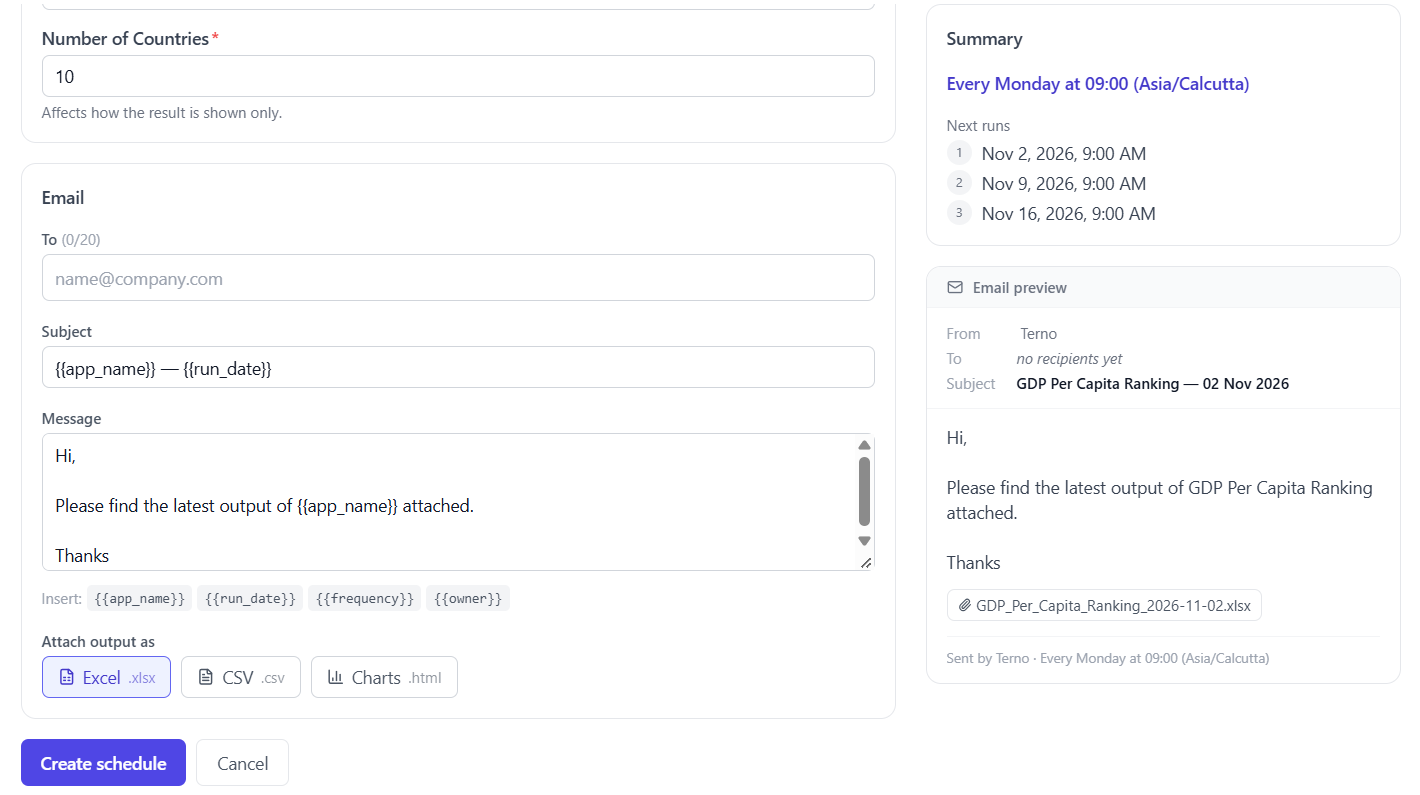
-
Check the Summary, which shows the next run times and the email details, then click Create schedule.
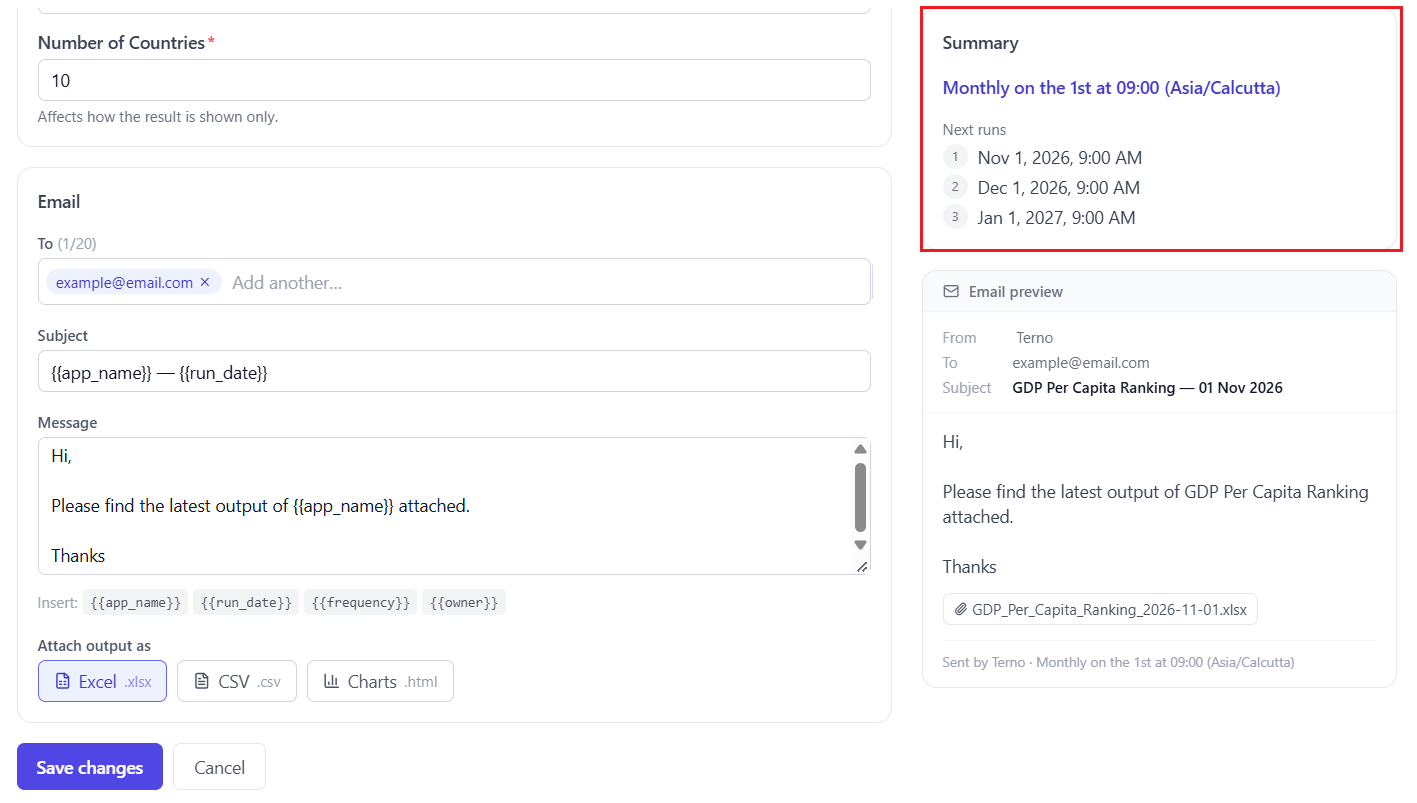
Manage schedules
Section titled “Manage schedules”Each app’s Schedules tab lists its schedules. The Schedules tab on the App Services page lists all of yours in one place.
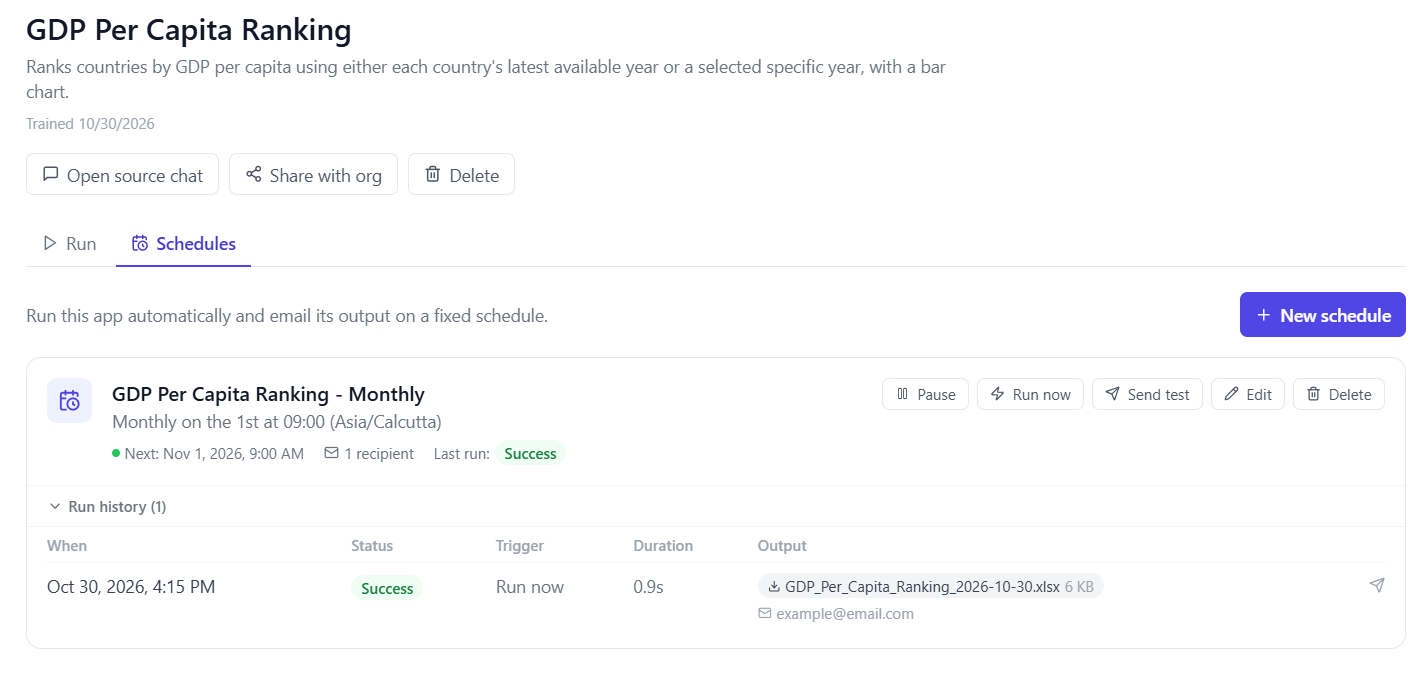
- Run now: run it straight away and email the recipients.
- Send test: run it and email the result only to you.
- Pause / Resume: stop and restart the schedule.
- Edit: change the timing, inputs, or email.
- Delete: remove the schedule and its run history.
- Run history: see past runs, download their attachments, and click Resend email to send a successful run again.
When a run fails
Section titled “When a run fails”If a scheduled run fails, Terno emails the schedule’s owner with the reason. After 3 failed runs in a row, the schedule pauses itself and shows why. Fix the problem, for example by updating the app, then click Resume.
Troubleshooting
Section titled “Troubleshooting”- “Scheduling is not available”: scheduling is temporarily unavailable for your workspace. Try again later, or contact Terno support if it continues.
- “Add at least one recipient” or ”… is not a valid email address”: check the To field.
- Nobody received the email: use Send test to check it reaches you, then check the recipients’ spam folders.